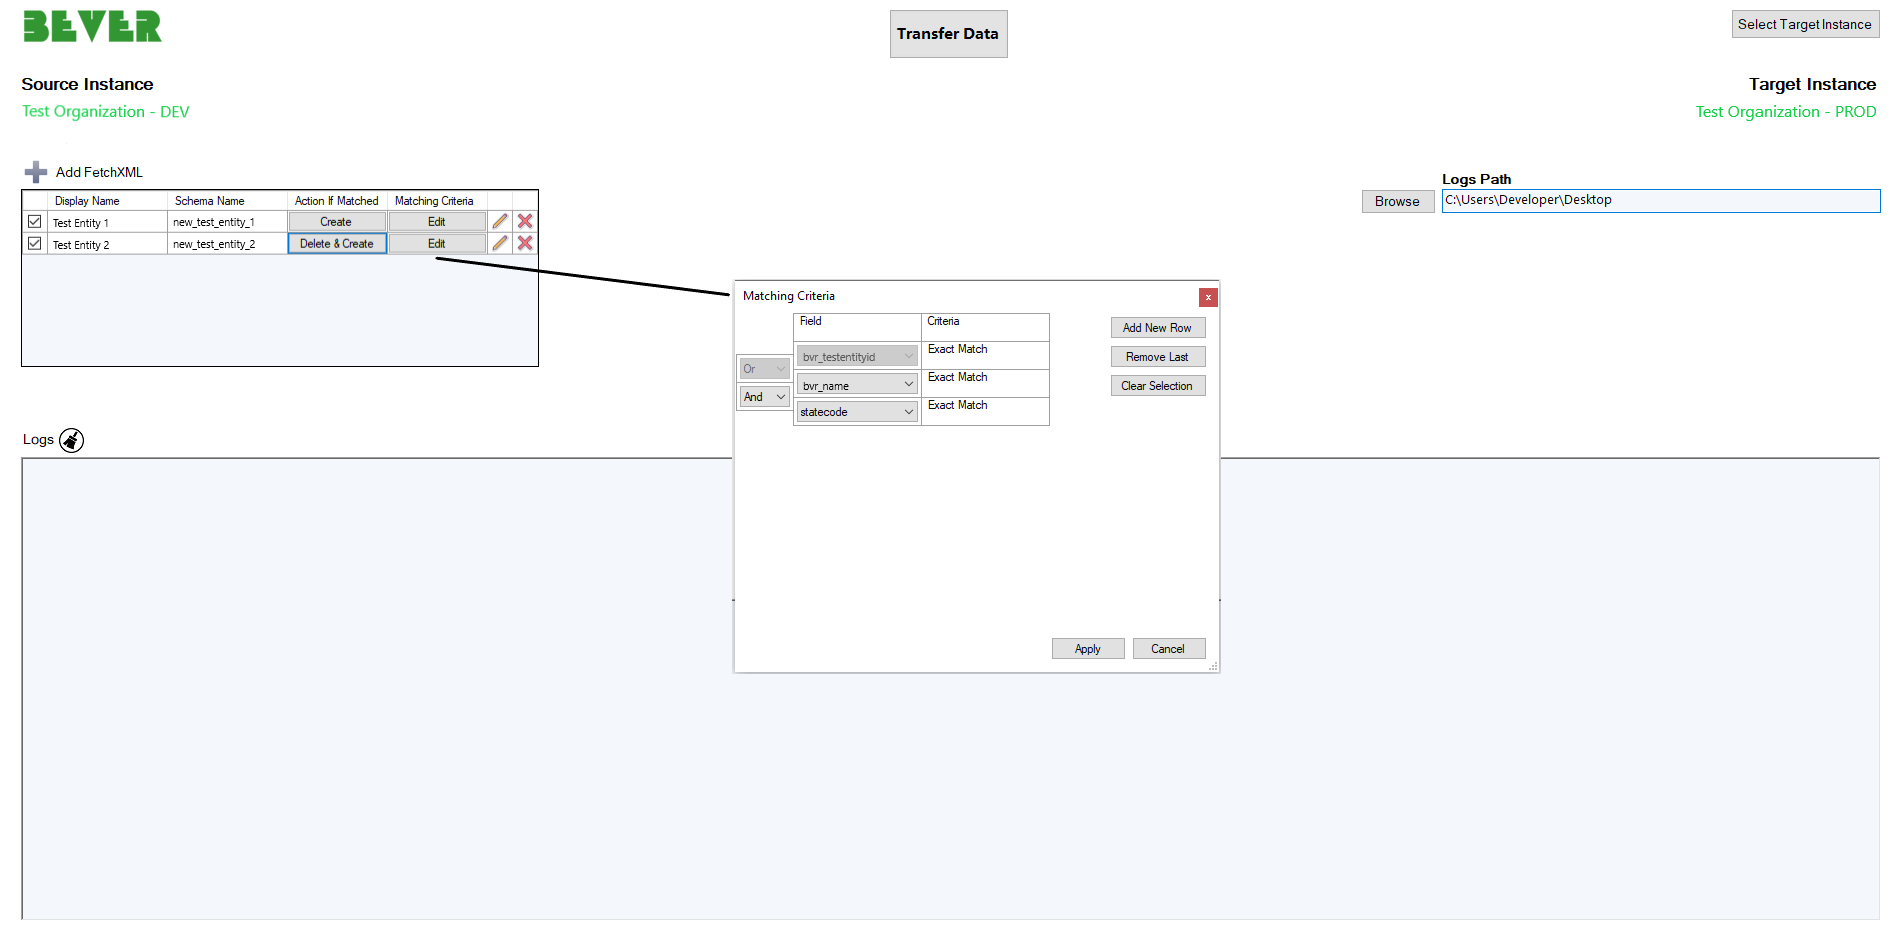
This utility allows the user to migrate data of the entity from source to target.
The user needs to define FetchXml queries for each entity to which data should be migrated.
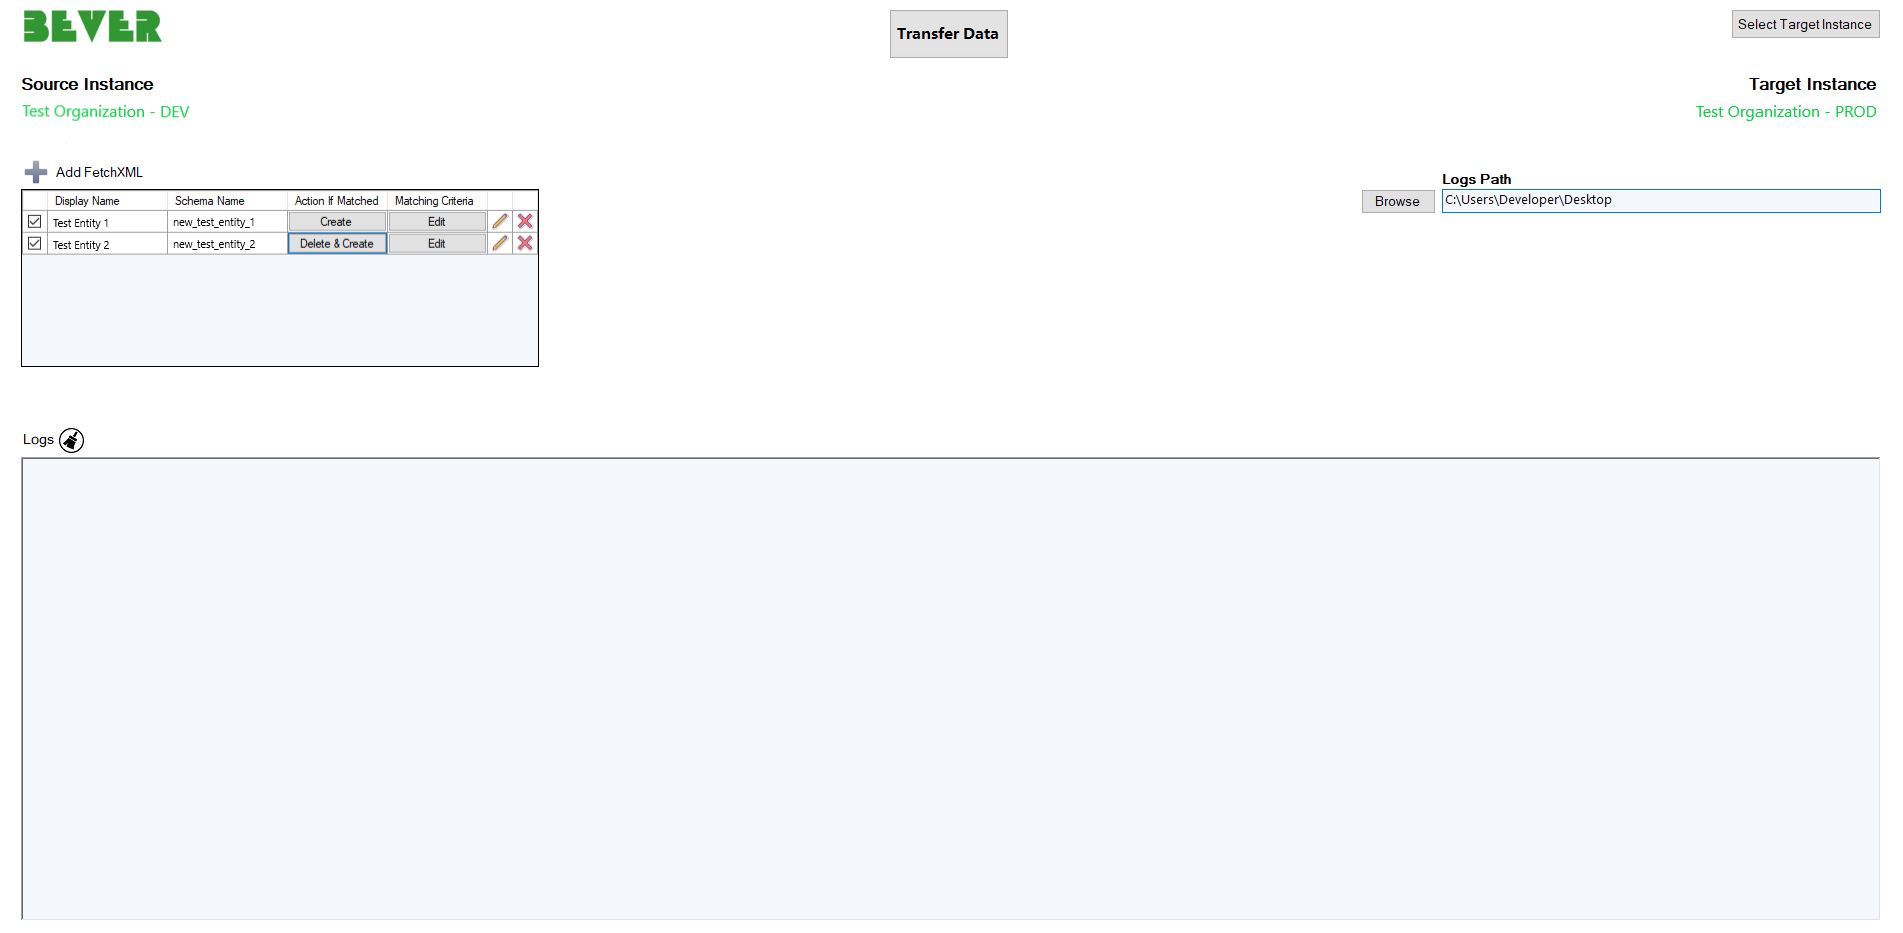
The utility has the following input parameters:
- Source Instance – Source instance is the default instance that is connected via XRMToolBox.
-
Target Instance – Target instance can be selected by clicking on the
Select Target Instancebutton. -
Logs Path – Directory where the system will save the
Log.txtfile. - FetchXml Table – Table to add FetchXml either by typing manually or selecting a file.
For the lookup fields, the user can specify the search by name instead of searching by id. For that, it’s needed to add the SearchByPrimaryField="true" attribute in the FetchXml attribute tag.
For example
<attribute name="transactioncurrencyid" SearchByPrimaryField="true" />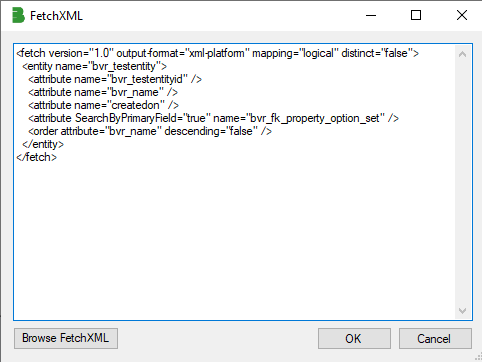
Note` Link entities can be used only for filtering or sorting purposes. For field values migration each FetchXml grid line should represent only one entity.
You can update a target instance using the appropriate criteria.
- Create – Does not delete the corresponding target record and creates a source record. (Will error in case of primary key matching)
- Delete & Create – Deletes matched record and creates source record. (Will create in case of not matching)
- Upsert – Updates matched target record with source record data. (Will create in case of not matching)
- Don't Create – Does not create a source record.
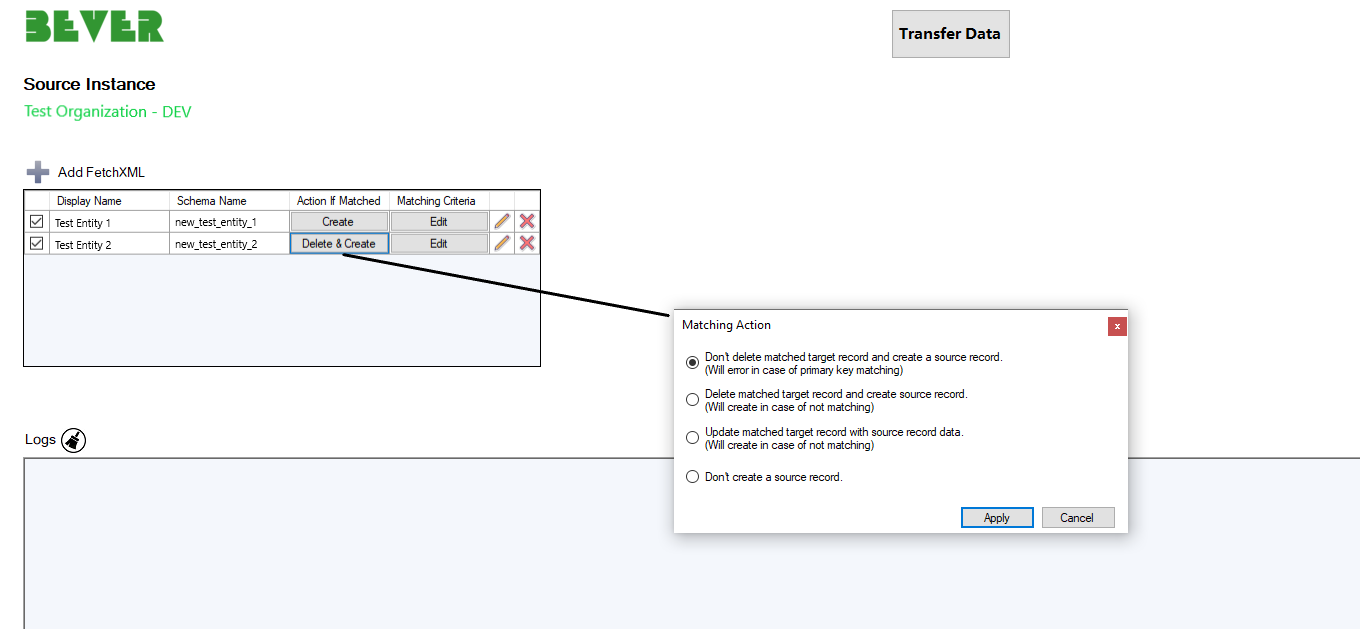
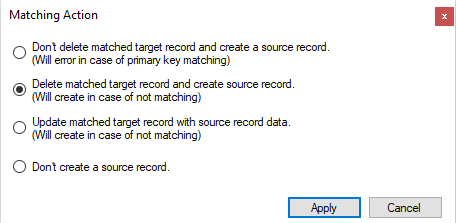
After choosing one of these actions you can set matching criteria to migrate your data more accurately.
Note` Matching criteria are not available for the Create action.
If you have a primary key in fetchXml, it will be selected by default in the Matching criteria. You can also add a new row and select an attribute name from the dropdown, which will display all attribute names from fetchXml, and you can bind selected rows using "AND" or "OR" operators.